
The smoker itself needs to be off the ground a bit so that there can be some air flow. There were lots of choices of course, including actual terra cotta pot stand things, but that seemed a little classy for me. I found these bricks for $0.49 each - which was good because by the time I got this the point where I was going to buy these, I was way over budget. And they match the pots pretty well, too.
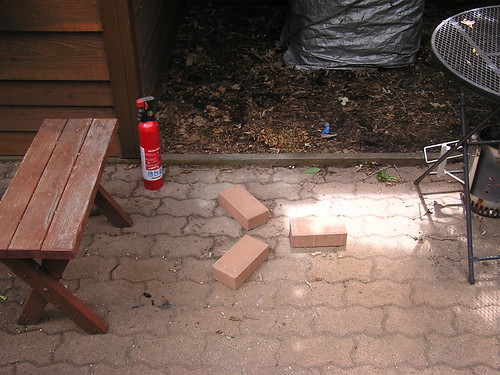
Then I remembered that since there would be wood burning, it might be a good idea to have a fire extinguisher nearby.
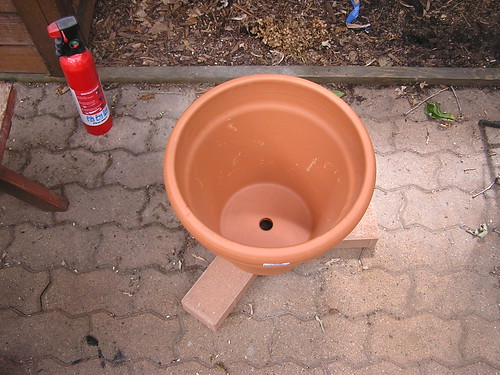
That's the bottom half of the smoker, put on the bricks. See, this is not rocket science here. The terra cotta pots are the 16" size, which I picked because of the grill that fit inside best. Also, they were a little more than I thought they would be, around $22 each.

That's a $10 burner I got at Walgreen's. The best reason to go with bigger pots would be that the burner would probably fit inside better. This is a 1000 watt model, which is the minimum that is going to provide enough heat. If there was a 1500 watt one, I would have used it. As you can see, I ran the cord out of the bottom hole of the pot.
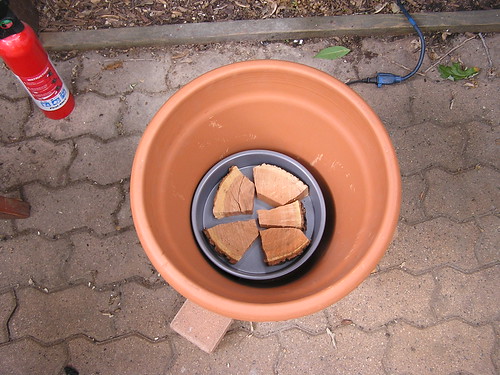
That's some wood in a heavy duty pie pan on top of the burner. You can't use those flimsy metal pie tins, as they will likely melt, which could wreck your whole thing. Plus - yuck, I don't think you want to eat that stuff. So I knew I had to have a pretty heavy duty pie tin. The wood you see there is Wild Cherry wood, which is nothing special really, I got a bag of it from the Co-op for $10. THERE IS NOT ENOUGH WOOD ON THAT PAN IN THIS PICTURE. I realized later that piling the wood on was a much better idea. It was hard getting it to be hot enough otherwise.
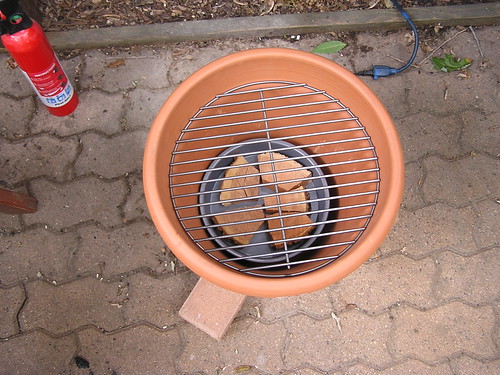
Then I put the grill on (after I turned the burner on of course). The fit was perfect, which is why I had decide on this size of pot. That's actually the bottom grill from a full size Weber, the one that the coals are normally placed on. It could not have fit in the smoker better.
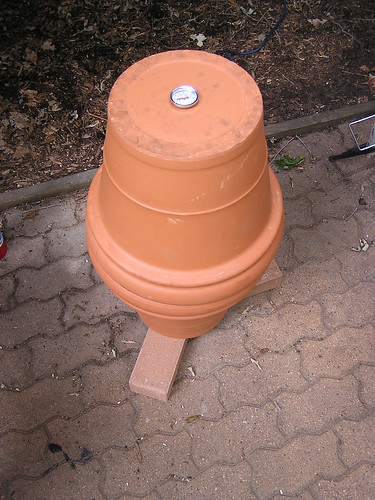
The last pieces were to put the other terra cotta pot on top, and plug the whole with the thermometer. That's a simple replacement thermometer, and it has a short stem on it. I don't think it is the most accurate reading possible, but it looks cool and it does cover the top hole. Although at $9, it was a little steep.

Feel the love. You know that feeling when you can't stop thinking about something for weeks and then you finally make it happen? That's the smile I get on my face when that happens to me. It was cool.
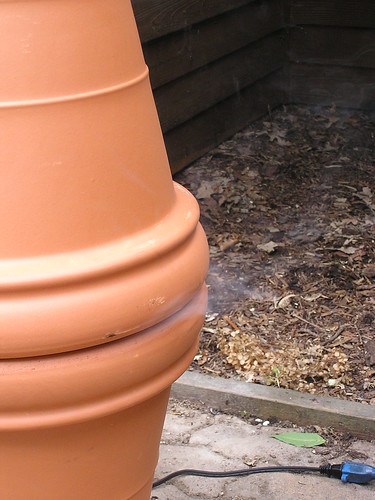
SMOKE!
Now this is where things did get a little dicey. I had three overall concerns before I began this project:
- Don't burn the house down.
- Don't give myself a third degree burn playing with this stuff.
- Make sure the smoker is not too hot, thereby defeating the purpose of the slow-cooked barbecue.
It turns out that the biggest problem I encountered was none of the above. I actually hard a hard time getting the whole thing hot enough to cook on. I had no interest in giving my family salmonella poisoning, so I had planned on pre-heating the smoker to make sure that it could get hot enough, BEFORE I put any food on the grill.
Much to my amazement, the thermometer on the grill seemed to be stuck around 175 degrees (I was looking for at least 225). I turned up the burner all the way, and then Nicole suggested I put more wood on, which was a great idea. I put a nice tower of wood on there, and then things got going. But the thermometer never registered above 200.
It was definitely hotter than that in the grill, which was very good news. I had always figured that it would be hottest at the top of the smoker, but I am almost 100% certain that it was much hotter lower in the smoker, closer to the grill. The bottom terra cotta pot was very hot to the touch, and when I finally put some wings on to give it a try, they sizzled, so I knew it was working.
Now, on to the meat:
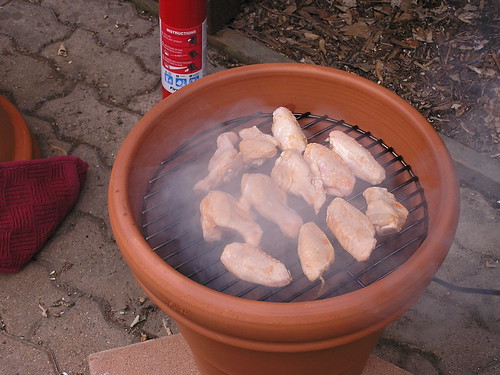
I started with wings because they are cheap, and would provide some measure of instant satisfaction since they would be cooked in about an hour. I marinated these is beer, Dr. Pepper and Louisiana Hot Sauce most of the day. It was a very thin marinade, which I wanted because I didn't want lots of stuff dripping down onto the wood. These were on the smoker for around an hour, and then I slapped the on the grill for a couple minutes to finish them.
I thought they were awesome. Others likes them too, but not as much. But you could almost taste the cherry from the smoking wood - it was very cool, and very satisfying to know that the smoker was indeed hot enough to got for something bigger.
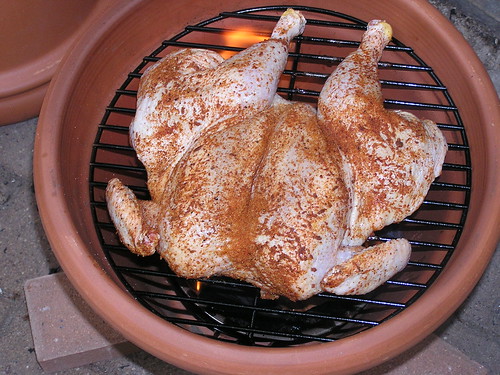
That is a 4 pound organic, free range chicken I got from the co-op. I love these chickens because they are cheap and very versatile. It's like a blank canvas - or something like that.
Anyway, I butterflied the chicken which was really fun, but not for the faint of heart. I wish I had had some surgical gloves - in fact, I might just buy a box because more and more I think it is a good idea to handle your meat that way.
After butterflying the bird, I did something I had never done before - I brined it. I made my brine in a small, clean cooler that I had. It was a mixture of water, salt, and molasses. There are about a million different brine recipes out there. I didn't want to cook my brine, because I didn't have time to wait for it to cool back down. It seems to me that if you aren't going to cook the brine, there isn't much point in putting a bunch of spices in it. Plus I was planning on using a rub for the chicken anyway, so no big deal.
I put the chicken in the cooler with the brine and a bag of ice to keep it cool and hold the chicken down. I brined for somewhere between 6 and 8 hours. I guess you aren't supposed to go too long, because your meat will turn to mush. Once the time was up, I took the meat out and rinsed it thoroughly, then dried it before applying my rub.
I have made my own rub before, from a recipe of course, and I really like to do it. Now that I can get bulk spices from the co-op, it's way cheaper to make your own rub. After you make a couple of rubs, you realize that SALT is the main ingredient in rubs. Since I had already brined this meat, I made my rub without salt this time.
Rub it up , and then I got it on the smoker. At this point, I was running up against the clock a little. The while process had already taken longer than I wanted it to, and the family wasn't going to wait until 10 pm to eat. So after 2 hours on the smoker, I took it off and finished it on the grill. When I put the meat thermometer in the chicken, I was pleasantly surprised to see that it was already up to 140 degrees, on its way to 165. I figure another hour on the smoker would have done it. But it only took 15 more minutes on the grill.

That's the finished bird right there. From that point, I took all the skin off, and then tore all the meat off the bones. We cut the meat up and used it for sandwiches. They were crazy good at the time, but the surprising thing was that they were even smokier the next day! And Nicole's Mom absolutely LOVED the meat we brought over for her. I don't even think she was just being nice.
I will absolutely be smoking away some more! It wasn't THAT hard, and the food was really good, and it isn't something you have every day. I still want to do the pork butt from the original tv show I saw that gave me this idea, but beef brisket and ribs are totally going to be good on there as well.
It was an excellent experience, it totally worked, and other than needing a shower and new clothes when I was done (stinky stinky smoke and meat!), we all got through it unscathed.
1 comment:
This is impressive stuff! I'm a big fan of smoking and may need to follow your lead on this and build myself one too. I'll be curious to hear how ribs go. Nice pics and posting too.
Post a Comment